In the realm of 3D modeling and computer graphics, textures play a pivotal role in transforming simple geometric shapes into captivating and lifelike objects. 3D modeling textures are the artistic touch that gives depth, realism, and personality to virtual worlds. This article aims to explore the significance of 3D modeling textures, their creation process, and how they elevate the overall visual experience in various industries and applications.
What is 3D Texturing?
3D texturing is a fundamental aspect of 3D modeling and computer graphics that brings life and realism to three-dimensional objects. It is the process of applying images or patterns, known as textures, onto the surfaces of 3D models to simulate various materials, details, and visual characteristics. These textures can represent anything from simple colors and patterns to intricate designs, such as wood grain, fabric, metal, or even complex weathering effects.
Texturing plays a vital role in enhancing the visual appeal and believability of 3D scenes and objects. By adding texture maps, artists and designers can create the illusion of roughness, smoothness, reflectivity, transparency, and other surface qualities that make the models look more lifelike. Texture mapping is achieved through UV coordinates, where a 2D texture image is wrapped around the 3D model’s surface based on specific coordinates.
The process of 3D texturing involves careful attention to detail and artistic skill. Texture artists meticulously design and apply these maps to achieve the desired appearance and evoke specific emotions in the audience. Additionally, advanced techniques like bump mapping, displacement mapping, and normal mapping can further enhance the level of detail and realism in 3D textures.
Types of 3D Textures
Types of 3D textures encompass a diverse range of techniques and approaches that add depth and realism to virtual objects. These textures play a crucial role in the field of 3D modeling and computer graphics, allowing artists and designers to recreate various surface characteristics with exceptional accuracy. Diffuse textures provide vibrant colors and patterns, while normal maps simulate surface bumps and dents. Specular maps define reflective areas, and displacement maps create height variations, contributing to the overall visual appeal of the 3D model. Texture artists employ a combination of methods, including texture painting, procedural texturing, and photogrammetry, to craft stunning and lifelike textures. Whether in video games, architectural visualizations, or product designs, the versatility of 3D textures enhances the quality and immersive experience of virtual environments and objects.
Choosing a Type of Material
Choosing the appropriate type of material and texture is a crucial aspect of successful 3D modeling and design. The right combination can elevate the visual impact of your virtual object and evoke the desired emotions in your audience. Here are some tips to help you make the best choices:
- Consider the Context: Think about the purpose and setting of your 3D model. Is it for a video game, architectural visualization, product design, or animation? Understanding the context will guide your material and texture selection;
- Research Real-World References: Look for real-world references of the material you intend to recreate. Analyze photographs, textures, and physical samples to capture the essence of the material accurately;
- Understand Material Properties: Each material has unique properties, such as roughness, glossiness, transparency, and reflectivity. Familiarize yourself with these properties and how they interact with lighting in a 3D environment;
- Focus on Detail: Pay attention to the finer details of the material and texture, such as imperfections, wear and tear, or natural variations. These nuances add authenticity to your 3D model;
- Use High-Quality Texture Maps: Ensure that your texture maps have high resolution and detail to produce realistic results. Invest in or create high-quality textures for the best outcome;
- Maintain Consistency: Keep the overall design and theme of your project in mind. Maintain consistency in material choices and textures to create a cohesive and harmonious visual experience;
- Experiment with Lighting: Test your materials and textures under various lighting conditions to see how they behave in different scenarios. Proper lighting can dramatically affect how the materials are perceived;
- Consider Performance: In real-time applications like video games, optimize your textures to strike a balance between visual quality and performance.
Types of Materials in 3D Modelling
In 3D modeling, various types of materials are used to define the appearance and properties of objects within a virtual scene. These materials play a crucial role in creating realistic and visually compelling 3D models. The most common types of materials used in 3D modeling are:
| Material Type | Description |
|---|---|
| Diffuse Material | Defines the base color or texture of an object, determining its primary appearance. |
| Specular Material | Controls the reflection of light on the object’s surface, affecting its shininess and reflectivity. |
| Bump Material | Adds surface details, creating the illusion of bumps or irregularities without modifying geometry. |
| Normal Material | Adds surface details more accurately with normal maps, enhancing realism. |
| Transparency Material | Controls the object’s opacity or transparency, allowing see-through effects. |
| Emission Material | Makes the object appear self-illuminated or glowing, emitting light. |
| Displacement Material | Modifies the object’s geometry, creating actual surface deformations. |
| Metal Material | Simulates metallic surfaces, accounting for reflections and metallic properties. |
| Glass Material | Replicates the appearance of glass, controlling transparency and reflections. |
| Subsurface Scattering Material | Used for objects that allow light to penetrate the surface, creating a soft and translucent effect. |
Stages of Texturing 3D Models
Now that you have a grasp of the industry-standard materials used in 3D modeling, let’s explore the stages of texturing 3D models in detail:
- UV Unwrapping: The first step is to perform UV unwrapping on your 3D model. By strategically “cutting” seams in the right places, you can lay out the entire mesh flat, creating a 2D representation of the model’s surface. This process allows the 3D modeling software to accurately apply textures and materials onto the model’s surface;
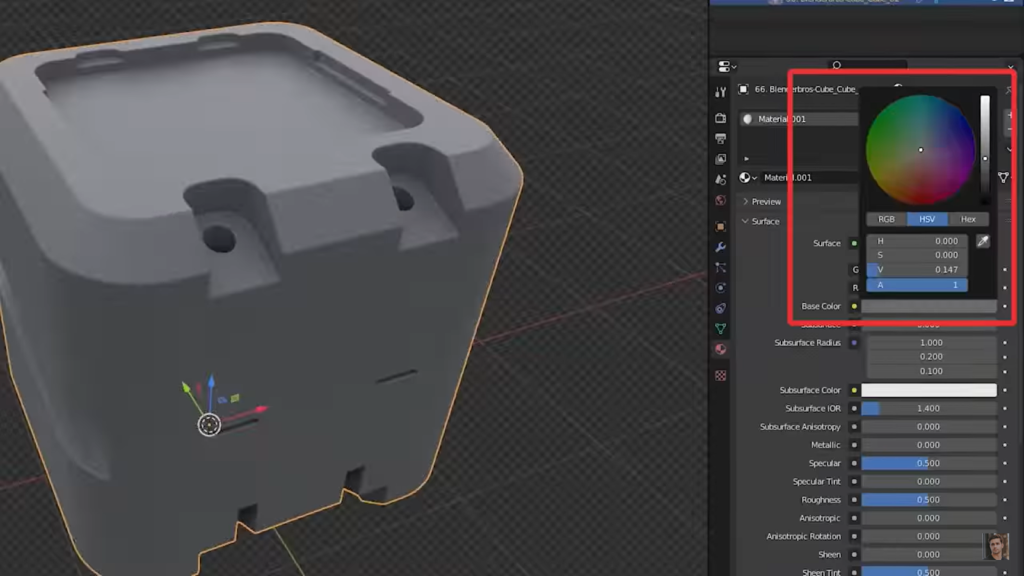
- Texture Painting and Shading: Once the UV unwrapping is complete, you can start adding textures and materials to the model. This involves setting parameters to mimic the real-world surface properties of the object being represented. Whether it’s human skin, fur, fabric, or metal, each surface requires distinct differences to appear authentic and interact realistically with light. For example, a piece of leather may need a polished appearance with light reflection, while a worn piece may lack reflections due to roughness;
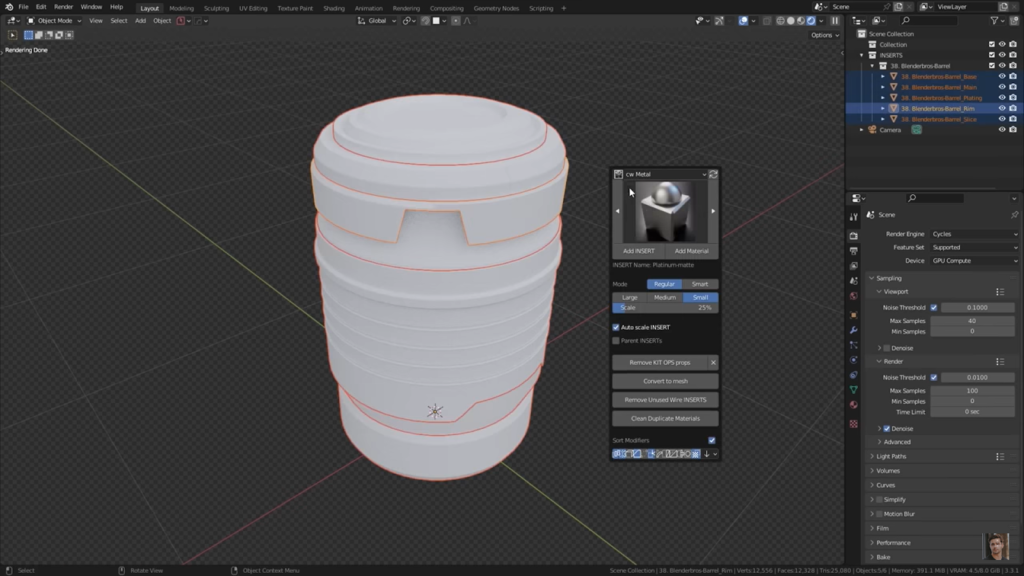
- Lighting and Rendering: Adding textures and materials is only part of the process; lighting plays a crucial role in the final result. Proper lighting not only makes the scene visible but also allows the materials to appear correctly. The parameters set for materials determine how they interact with light, and without appropriate lighting, the appearance of the model can be drastically affected. Achieving photorealism often depends on getting the lighting just right, as it can make or break the realism of the texture set.
How to Create 3D Textures
Creating 3D textures is a crucial skill for any 3D artist, as textures play a vital role in adding realism and depth to virtual scenes. The process involves several key steps and techniques:
- Model Optimization: Begin by creating a well-optimized 3D model with a clean topology. A model with good geometry ensures easier UV unwrapping and a smoother texturing process;
- UV Unwrapping: Carefully unwrap the 3D model’s surface, converting it into a 2D representation. Proper UV unwrapping is essential for ensuring textures are applied accurately and seamlessly;
- Texture Creation: Use specialized software like Adobe Substance 3D Painter or other texturing tools to create textures. Paint directly on the model, apply materials, and customize textures in real time;
- Material Library: Utilize existing material libraries or create your own collection of materials to speed up the texturing process and maintain consistency across projects;
- Texture Mapping: Explore various texture mapping techniques such as normal mapping, displacement mapping, and specular mapping to add finer details and realism to the textures;
- Photorealistic Materials: For highly realistic results, consider using photo-scanned materials from real-world images. Software like Adobe Substance 3D Sampler can automate the process and create seamless PBR materials;
- Lighting Considerations: Keep in mind how lighting affects the appearance of textures in your scene. Proper lighting enhances the realism of your 3D models and textures;
- Test and Refine: Continuously test your textures in different lighting conditions and scenes. Make adjustments as needed to achieve the desired look and feel.
Conclusion
3D modeling textures are a powerful tool that breathes life and realism into virtual worlds. From the intricate details of rough surfaces to the seamless blending of photorealistic materials, textures play a vital role in enhancing the overall visual appeal of 3D models. The process of creating textures involves a combination of artistic vision, technical expertise, and the right tools. With advancements in software like Adobe Substance 3D, artists can now explore a wide range of possibilities and achieve unprecedented levels of realism. Whether it’s creating custom textures, leveraging procedural techniques, or using scanned real-world materials, the world of 3D modeling textures offers endless opportunities for creative expression.